建议使用Omnibus包安装GitLab,因为它安装起来更快、更容易升级版本,而且包含了其他安装方式所没有的可靠性功能。同时推荐承载GitLab运行的服务器至少分配4GB的内存给GitLab。
Omnibus包安装方法
CentOS 6
企业版安装
1.安装并配置必要的依赖关系
如果想使用 Postfix 发送邮件,请在安装过程中根据提示选择 ‘Internet Site’。 也可以用 Sendmail 或者配置一个自定义的 SMTP 服务 并 把它作为一个 SMTP 服务器。
在 CentOS 系统上,下面的命令将会打开系统防火墙 HTTP 和 SSH 的访问。
|
|
2.添加 GitLab 镜像源并安装
|
|
如果不太习惯使用命令管道的方式安装镜像仓库,可以在这里找到 完整的安装脚本 或者选择系统对应的安装包 使用下面的命令手动安装。
|
|
3.配置并启动 GitLab
|
|
4.通过浏览器访问上一步配置的域名
第一次访问 GitLab,系统会重定向 url 到重置密码的页面,需要输入初始化管理员账号的密码。 设置完成后,系统会重定向到登录界面,就可以使用刚才输入的密码登录系统了。
系统默认的管理员账号为 root, 登录系统后,可以修改管理员账号为自己喜欢的账号。
社区版安装
1.安装并配置必要的依赖关系
如果想使用 Postfix 发送邮件,请在安装过程中根据提示选择 ‘Internet Site’。 也可以用 Sendmail 或者配置一个自定义的 SMTP 服务 并 把它作为一个 SMTP 服务器。
在 CentOS 系统上,下面的命令将会打开系统防火墙 HTTP 和 SSH 的访问。
|
|
2.添加 GitLab 镜像源并安装
|
|
如果不太习惯使用命令管道的方式安装镜像仓库,可以在这里找到 完整的安装脚本 或者选择系统对应的安装包 使用下面的命令手动安装。
|
|
3.配置并启动 GitLab
|
|
4.通过浏览器访问上一步配置的域名
第一次访问 GitLab,系统会重定向 url 到重置密码的页面,需要输入初始化管理员账号的密码。 设置完成后,系统会重定向到登录界面,就可以使用刚才输入的密码登录系统了。
系统默认的管理员账号为 root, 登录系统后,可以修改管理员账号为自己喜欢的账号。
CentOS 7
企业版安装
1.安装并配置必要的依赖关系
如果想使用 Postfix 发送邮件,请在安装过程中根据提示选择 ‘Internet Site’。 你也可以用 Sendmail 或者 配置一个自定义的 SMTP 服务 并 把它作为一个 SMTP 服务器。
在 CentOS 系统上,下面的命令将会打开系统防火墙 HTTP 和 SSH 的访问。
|
|
2.添加 GitLab 镜像源并安装
|
|
如果不太习惯使用命令管道的方式安装镜像仓库,可以在这里找到 完整的安装脚本 或者选择系统对应的安装包 使用下面的命令手动安装。
|
|
3.配置并启动 GitLab
|
|
4.通过浏览器访问上一步配置的域名
第一次访问 GitLab,系统会重定向 url 到重置密码的页面,需要输入初始化管理员账号的密码。 设置完成后,系统会重定向到登录界面,就可以使用刚才输入的密码登录系统了。
系统默认的管理员账号为 root, 登录系统后,可以修改管理员账号为自己喜欢的账号。
社区版安装
1.安装并配置必要的依赖关系
如果想使用 Postfix 发送邮件,请在安装过程中根据提示选择 ‘Internet Site’。 你也可以用 Sendmail 或者 配置一个自定义的 SMTP 服务 并 把它作为一个 SMTP 服务器。
在 CentOS 系统上,下面的命令将会打开系统防火墙 HTTP 和 SSH 的访问。
|
|
2.添加 GitLab 镜像源并安装
|
|
如果不太习惯使用命令管道的方式安装镜像仓库,可以在这里找到 完整的安装脚本 或者选择系统对应的安装包 使用下面的命令手动安装。
|
|
3.配置并启动 GitLab
|
|
4.通过浏览器访问上一步配置的域名
第一次访问 GitLab,系统会重定向 url 到重置密码的页面,需要输入初始化管理员账号的密码。 设置完成后,系统会重定向到登录界面,就可以使用刚才输入的密码登录系统了。
系统默认的管理员账号为 root, 登录系统后,可以修改管理员账号为自己喜欢的账号。
手动部署
1.配置yum源
|
|
复制以下内容
|
|
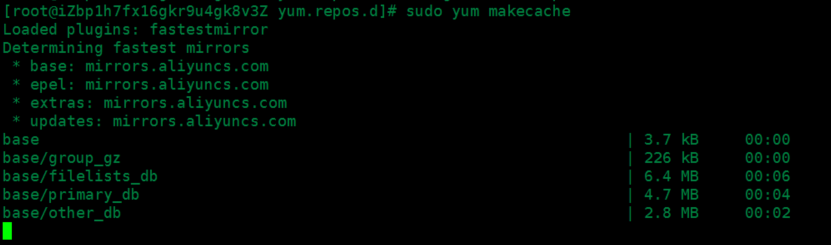
2.更新本地yum缓存
|
|
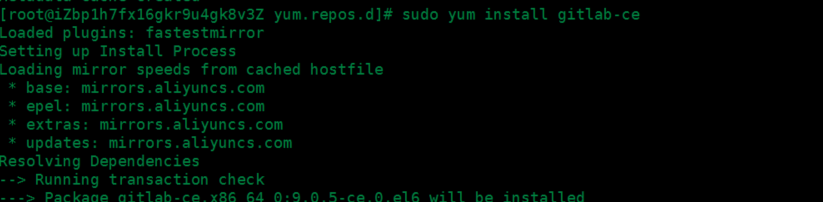
3.安装GitLab社区版
|
|
GitLab常用命令
|
|